
Accessories for Drilling machines, Machine Shop Accessories, Tools & Instruments
Drill Hand Remer
₹3,500
- Drill Remer
- A reamer is a type of rotary cutting tool used in metalworking
- Reamed holes are used to create holes of precise circularity and size
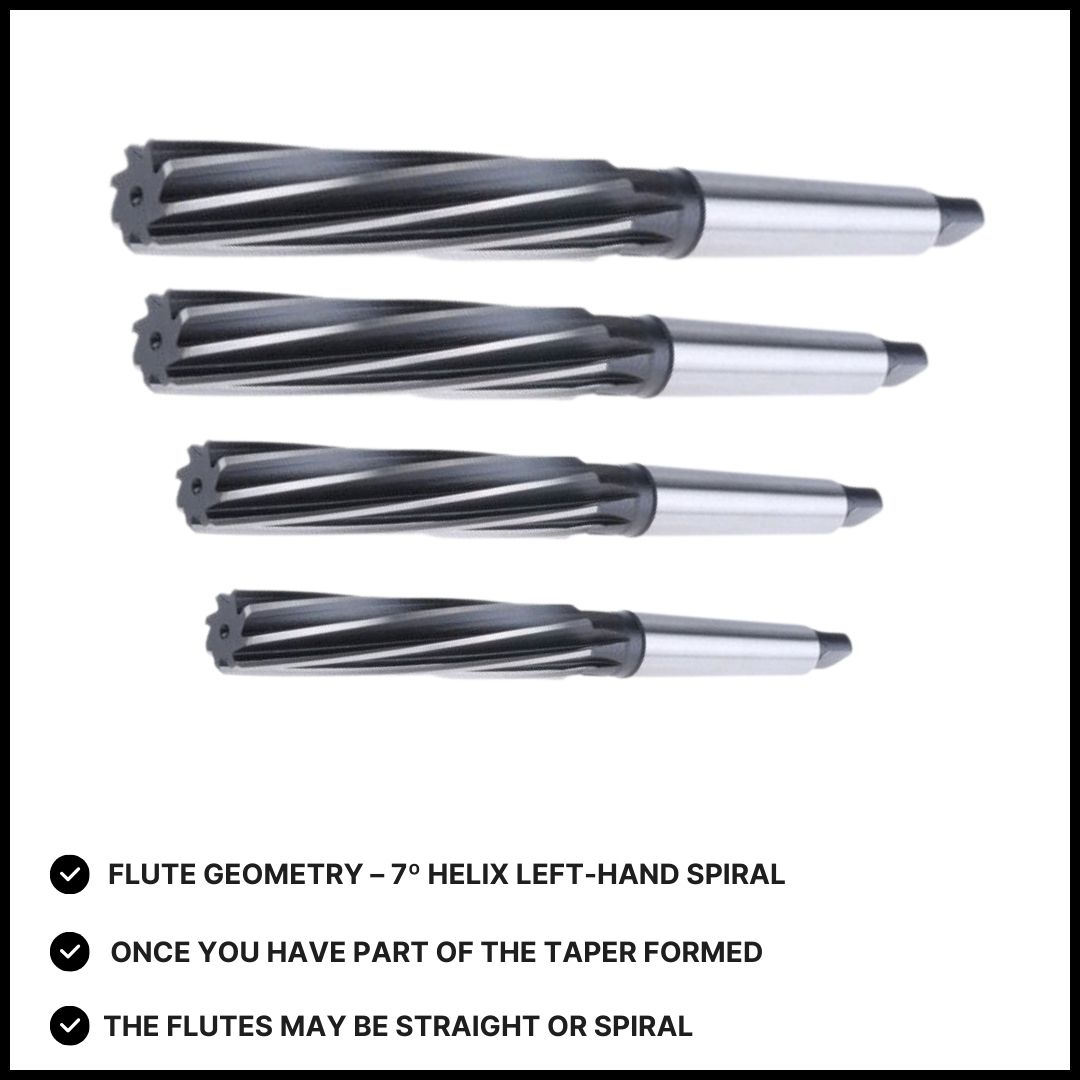
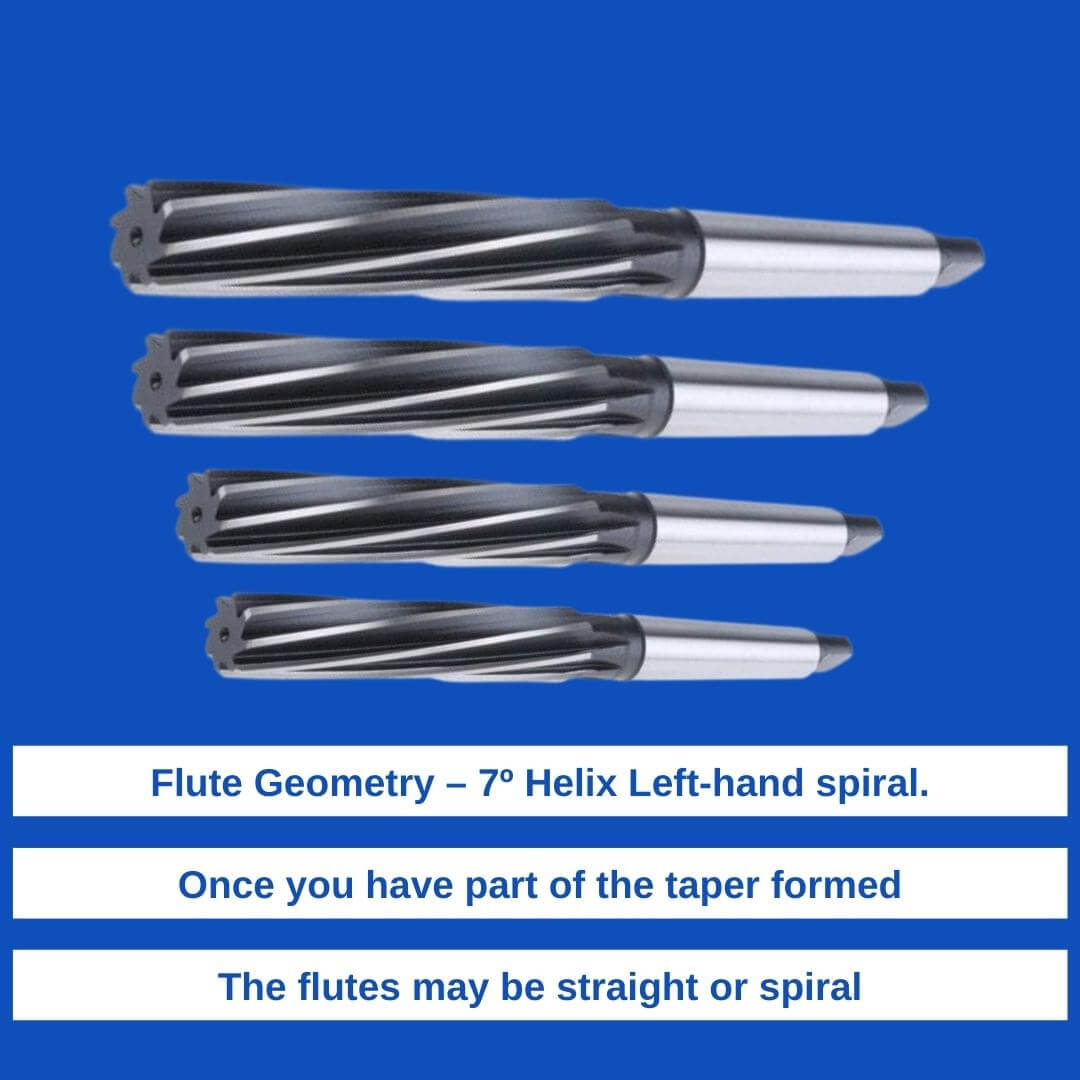
- Flute Geometry – 7º Helix Left-hand spiral.
- Weight – 200g
- Colour – Light Silver
- Hand reamers have a square on the end of the shank which allows placement into a wrench which the user rotates by hand.
- Used for opening out and finishing existing holes to H7 tolerance in most ferrous and non-ferrous metals.
- Flute Geometry – 7º Helix Left hand spiral.
- To obtain the best results when using reamers it is essential to make them work. It is a common fault to prepare holes for reaming with too little stock left in. If insufficient stock is left in the hole before reaming then the reamer will rub quickly, show wear and will result in loss of diameter. It is equally important for performance not to leave too much stock in the hole.
- A hand reamer has a longer taper or lead in at the front than a machine reamer. This is to compensate for the difficulty of starting a hole by hand power alone. It also allows the reamer to start straight and reduce the risk of breakage. The flutes may be straight or spiral.
USAGE & ADVANTAGES:
- Once you have part of the taper formed.
- You can check the taper angle by marking a good taper with marking pen and slipping it into the partial taper and giving a rotation.
- It also allows the reamer to start straight and reduce the risk of breakage.
- The flutes may be straight or spiral.
A drill hand reamer is a tool used to smooth and enlarge holes that have been drilled. It’s typically used in metalworking, woodworking, and sometimes in other materials. Here’s a basic guide on how to use one:
- Choose the Right Reamer: Select a reamer that matches the diameter of the hole you need to enlarge. Ensure it is compatible with the material you are working with.
- Prepare the Hole: Ensure the hole is clean and free of debris. If the hole is rough, you might want to drill it slightly undersized before reaming.
- Insert the Reamer: Place the reamer into the drill chuck. It’s important to ensure that the reamer is properly aligned and secured in the chuck to avoid wobbling or uneven cutting.
- Set the Speed: Use a low speed when reaming. Unlike drilling, reaming should be done at a slower speed to ensure a smooth finish.
- Ream the Hole: Gently start the drill and slowly feed the reamer into the hole. Apply light, consistent pressure. Allow the reamer to do the work without forcing it, as excessive force can cause damage to the tool or workpiece.
- Withdraw the Reamer: Once the hole is reamed to the desired size, slowly withdraw the reamer from the hole. Do this carefully to avoid snagging or breaking the reamer.
- Clean Up: After reaming, clean the hole and the reamer to remove any debris or chips.
Safety Note: Always wear appropriate personal protective equipment (PPE) such as safety glasses and gloves when using power tools.
Related Products
Sale